Doing Your Own Oil Change Is Easier Than You Think
As cars get more complex (and expensive), and ease-of-access to repair & maintenance shops continues to grow, less people know how to properly maintain, or repair, their vehicle than ever before. Luckily for you, we’re going to go over five auto repairs and maintenance jobs that are fairly easy for you to do at home.
Before we get into it, we would like to note: this is a ‘beginner’s guide’, a ‘101 crash course’, and is meant to help spread awareness of the ‘ease’ of this common vehicle maintenance. The details or images in this guide may not apply EXACTLY to your car. If you’re trying to find out how to do a specific repair on a specific vehicle, there are lots of resources available for you, including one of our personal favorites, 1A Auto Video Tutorials.
How To Do An Oil Change Yourself
Changing your engine oil is a task that can be done in less than an hour, and it’s a great way to save money on vehicle maintenance. Before starting, make sure you have the following items:
- New engine oil (we recommend synthetic oil on all modern vehicles, especially if you’re doing your own oil change)
- New oil filter (make sure you buy the correct filter, most parts stores have a book in the aisle for you to reference)
- A drain pan for holding used oil (make sure you have enough room in the pan/receptacle for 4-8qts of oil!)
- A socket wrench to remove the drain plug
- An oil filter wrench or filter removal tool (depending on the type of car you have)
- A funnel to add new motor oil into the engine (again, depending on your vehicle)
Now that you’ve got all your tools ready, here’s how to change your car’s engine oil:
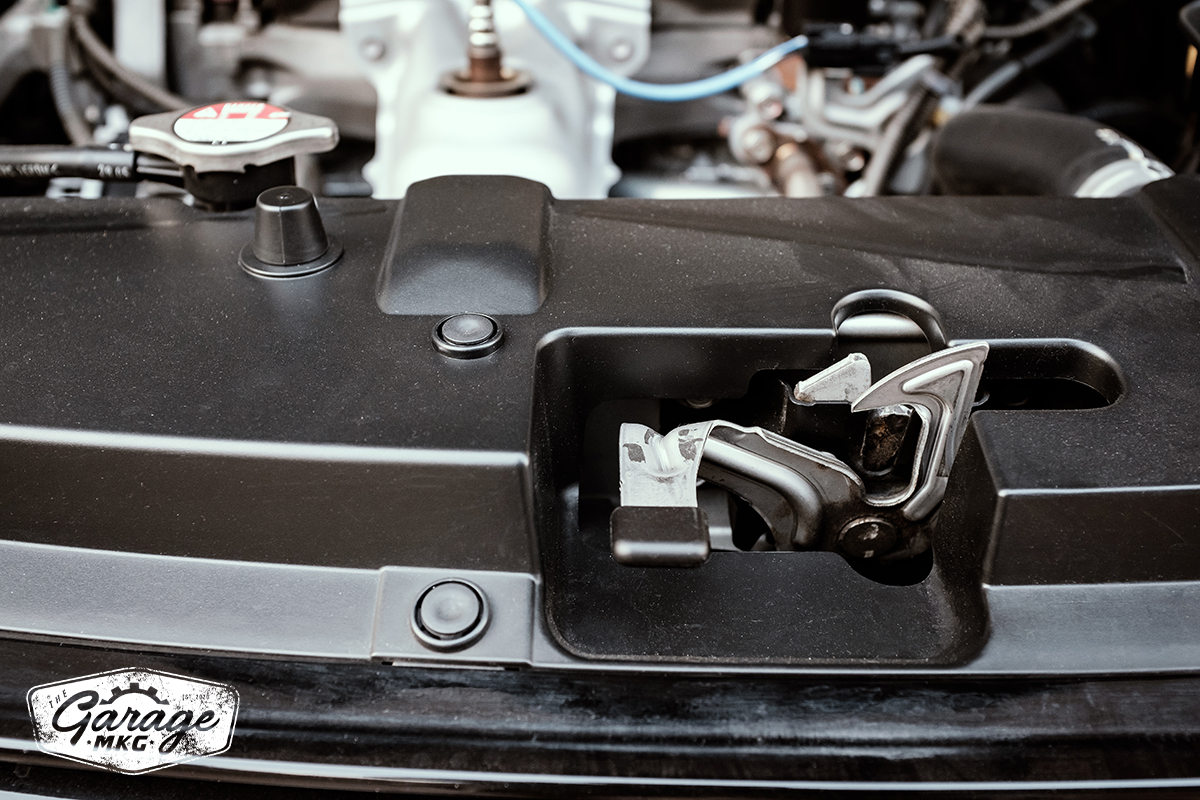
- Release the hood latch and open the hood of the vehicle. Make sure your hood is safely propped using a prop stick or hood strut. Side note: especially in the cold, the hydraulic hood strut (also known as shock) on many modern vehicles may not work properly, causing the hood to close/lower while you are working on the vehicle. Verify that this shock is ‘extended/engaged’ and staying put before moving under the hood – it’ll save you some headaches & bruises.
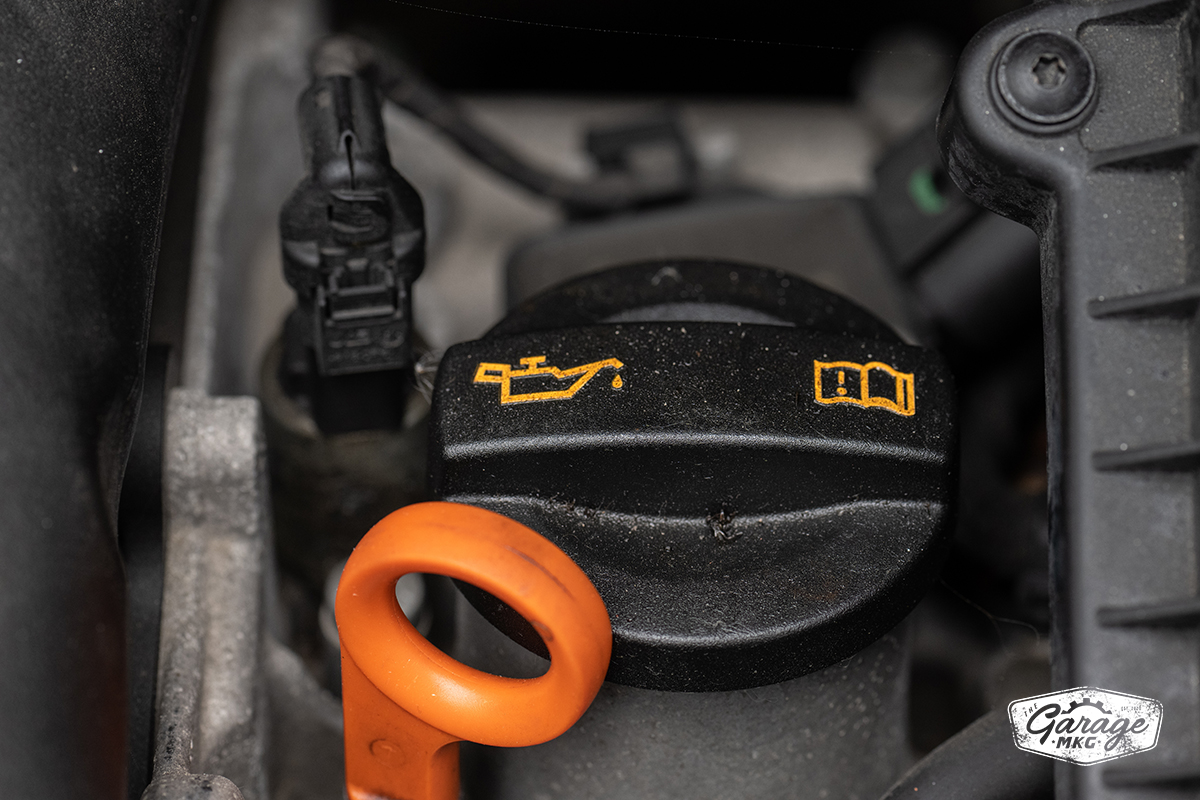
- Locate the engine oil filler cap & dipstick. If you’re unable to locate these, here’s some tips: Most oil dipsticks will have a yellow handle and will be located immediately on the front or side of the engine. Most oil filler caps will have an oil can or oil weight (i.e. 0W20, 5W30) printed on the cap, and will also be jutting out directly from the top of the engine (a valve cover, usually).
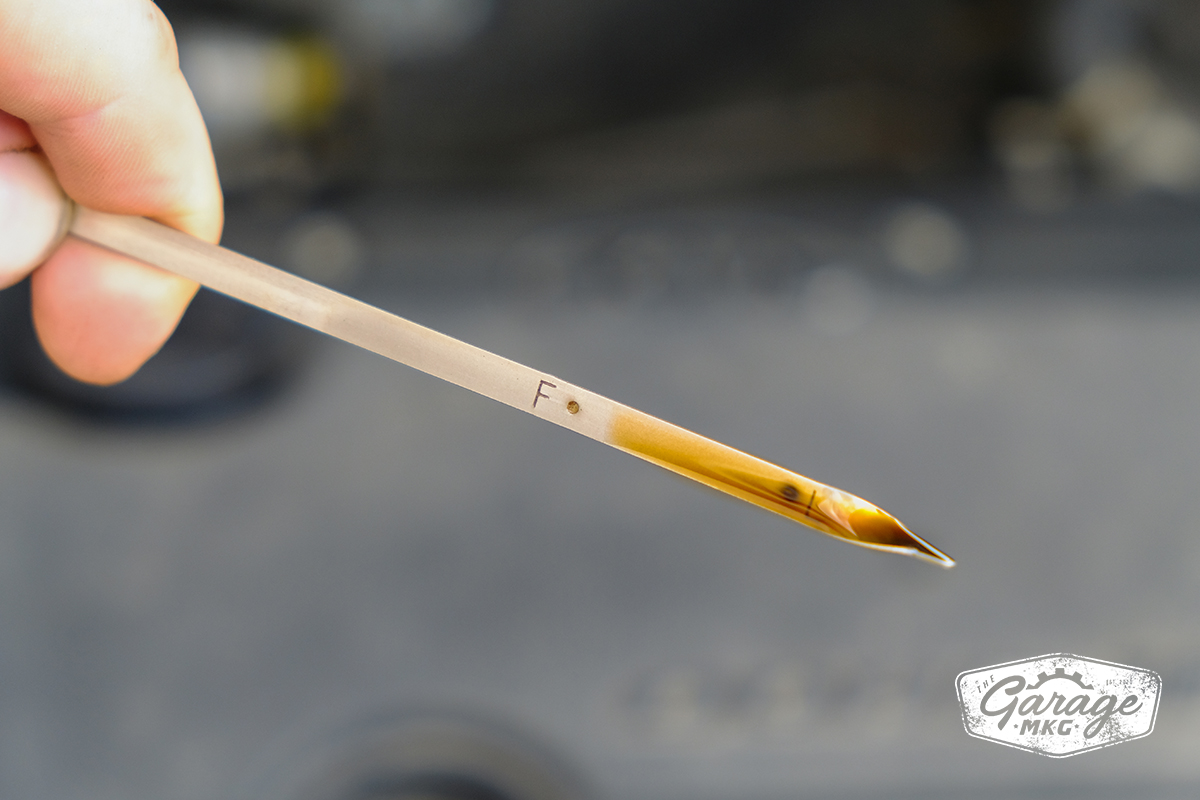
- Remove the oil filler cap and check the oil dipstick. Make sure to take a mental/physical note of the quality/quantity – if your oil is very low, dark, or ‘milky’, you may want to consult with an automotive expert about why this is happening.
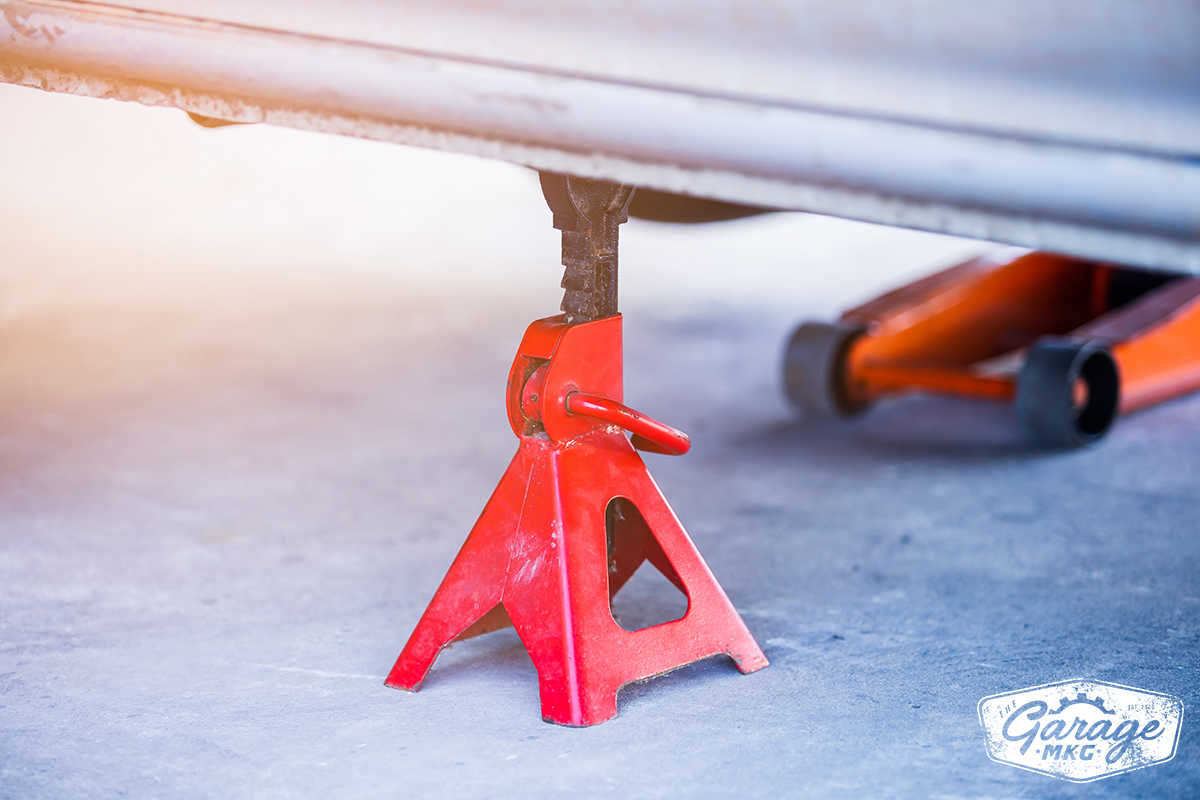
- Jack up your car (from a safe jack point in the front of the vehicle) and place it on jack stands. This will allow you to safely work underneath the vehicle – besides, most vehicles are too short for you to climb under anyways (trust me, we’ve tried). Nowadays, they also manufacture auto ramps that you can drive up onto, eliminating the need for a jack altogether.
WARNING: If you have your vehicle jacked up/on ramps, it is imperative for your safety that the following are true: your parking brake is on, there are blocks behind the vehicle’s tires, and if using a jack, the vehicle is moved to jack stands before wrenching starts.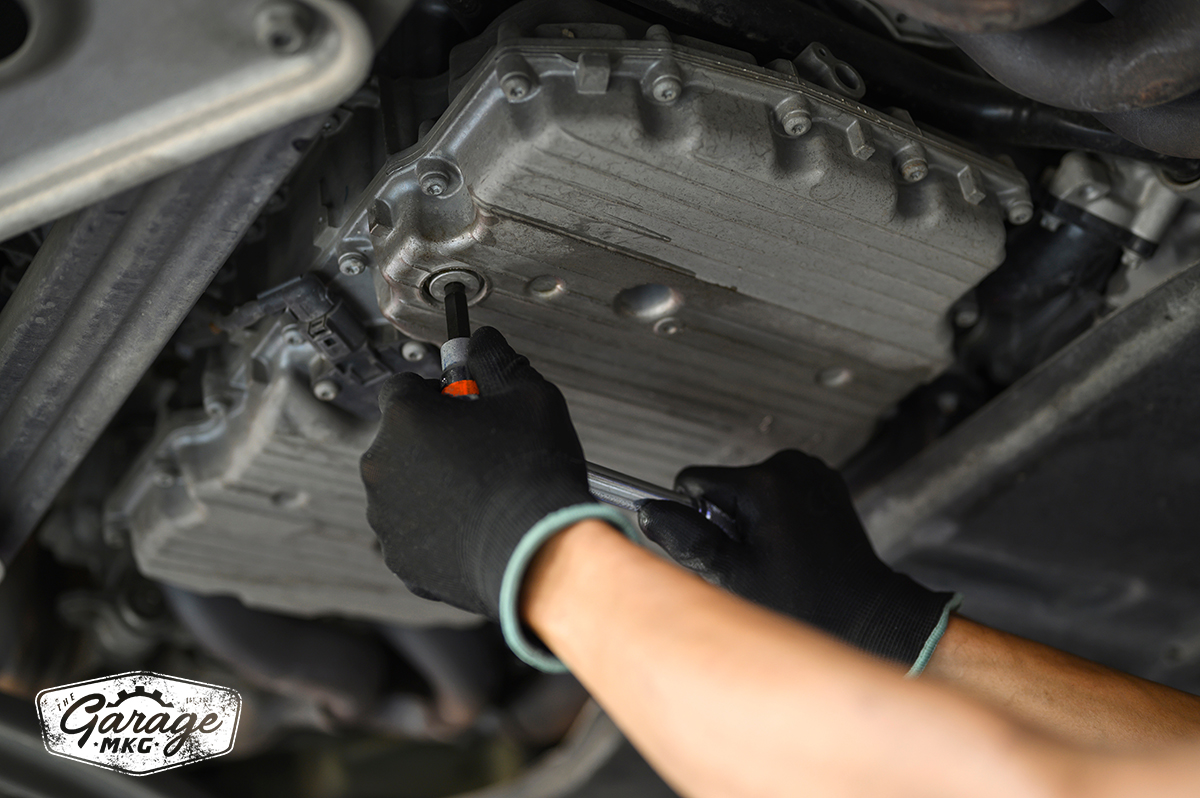
- Locate your engine oil drain plug & engine oil filter. Your engine oil drain plug will typically be found on the bottom of your engine, on your oil pan. Most commonly, it is a standard, hexagonal bolt. The most common sizes for this bolt are 13mm, 14mm, 15mm, 16mm, 17mm, and 19mm. However, on some vehicles, usually of European descent, this bolt may also have a Torx head, ranging from T25-T55 in size.
Locating your oil filter may prove to be a bit trickier, however. The ‘traditional’ placement for a spin-on-style oil filter has commonly been somewhere next to the oil pan on the bottom side of the engine. Look out for a metal canister next to the oil pan – most filters are painted a hue of white, blue, yellow, or black.

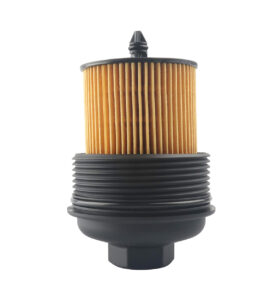
- However, some vehicles have what is called a ‘cartridge filter’. These filters are more common on newer vehicles, and are essentially a ‘deconstructed’ oil filter, which uses a plastic/metal housing on the engine itself to contain the filter elements, rather than a standalone metal body like a spin-on filter. These filter housings are commonly placed either in the engine bay (near the top/middle of the engine), but can also be found under the car (in some Toyotas, BMWs, and other imports).
Now that you know where the bits are, it’s time to get to work.
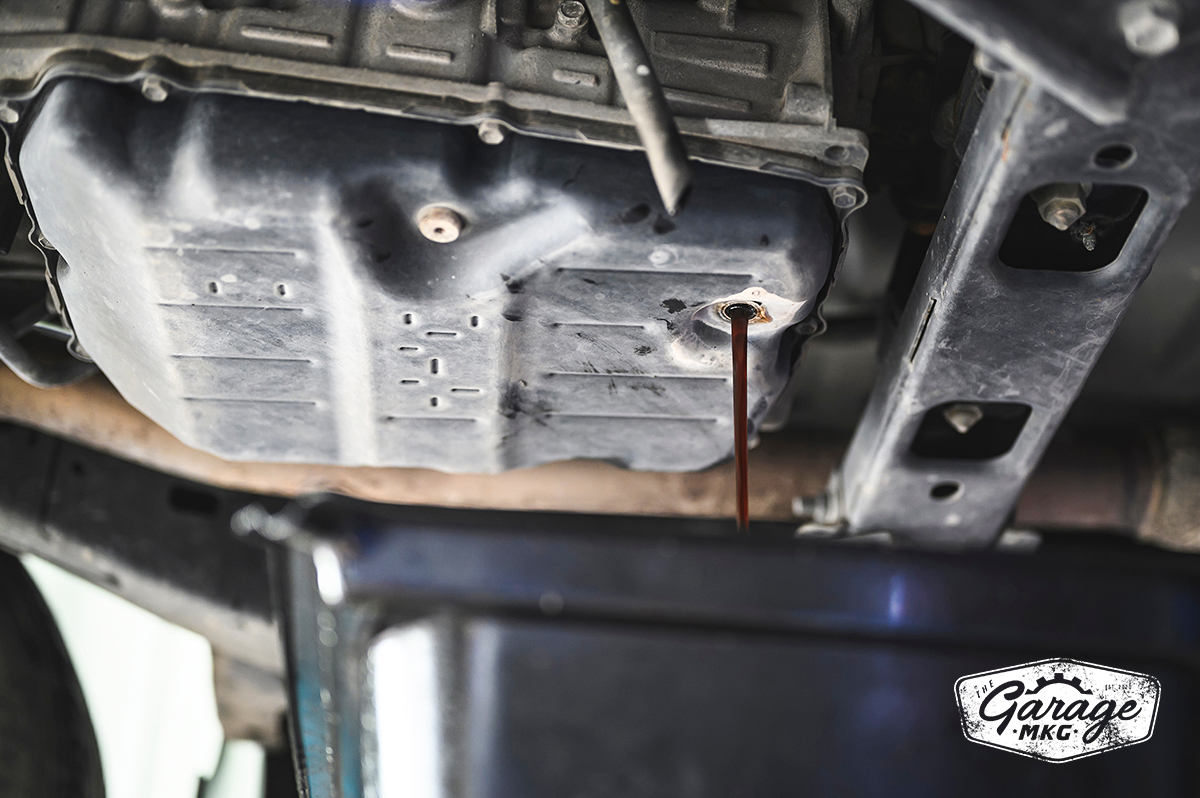
- Remove the drain plug and let the used oil completely drain. Remove the oil drain plug using a hand or socket wrench (refer above to common sizes for the socket/wrench), and let all of the oil completely drain into your pan – set aside your drain plug and socket wrench.
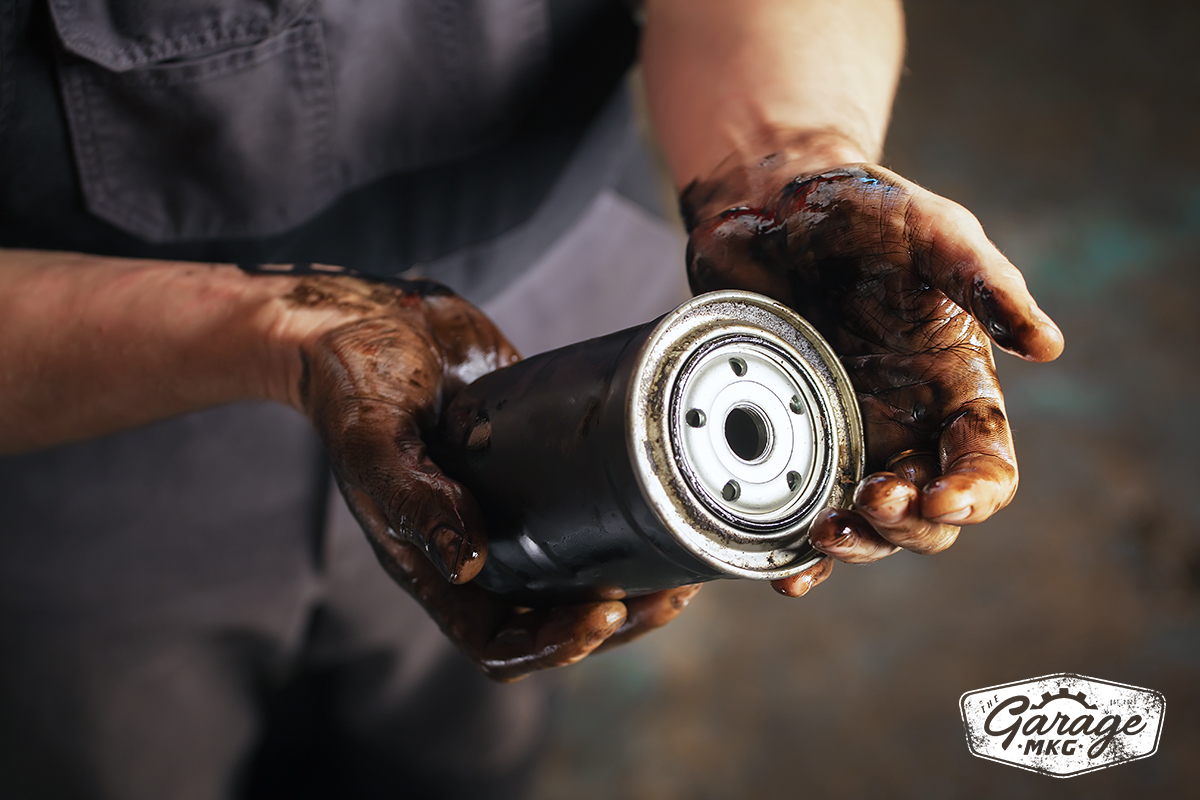
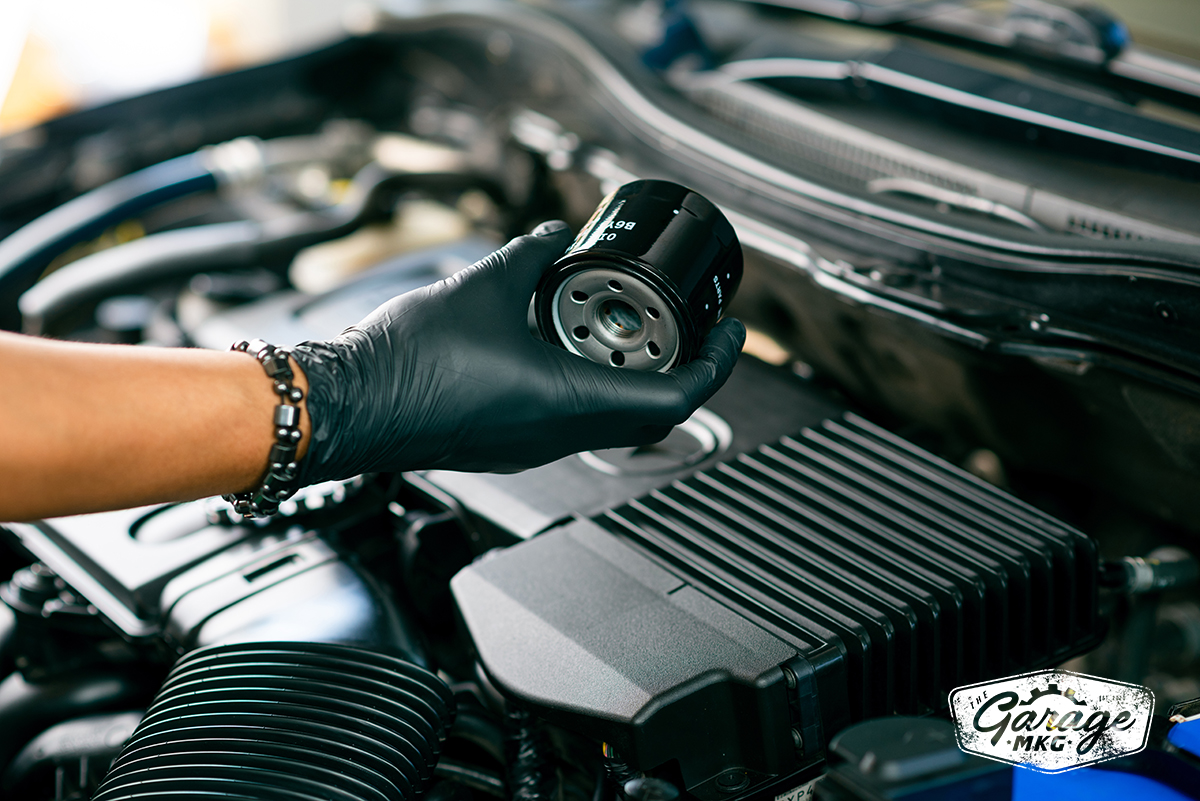
- While the drain plug is out, remove the oil filter. There are a few ways this will happen: if you’re strong, you can remove some spin-on filters by hand. Otherwise, use a strap wrench (spin-on filters) or socket wrench (cartridge filters) to remove the oil filter or oil filter housing.
NOTE: Used oil will usually seep from the old filter/filter housing upon removal of the filter. Make sure you’re prepared by throwing some rags/the oil pan under the filter or housing.
- Lubricate the rubber gasket(s) on your new oil filter with new engine oil, and replace and tighten the new filter. This is IMPORTANT – all oil filters have some sort of rubber gasket that seals them to the engine. On spin-on filters, this gasket is along the top. On cartridge filters, these gaskets are usually an ‘O-ring’ on the filter housing cup, and sometimes, they are a pain to remove without a pick tool. If you have a cartridge-style filter, a new O-ring should be supplied with your new oil filter.
Another thing to note is how tight your oil filter should be; the industry standard is “hand tight + one quarter turn”. This means that once the filter/housing is spun on until it contacts the engine firmly, and then spun/tightened an additional 90 degrees. Remember, the oil filter needs to be tight to seal, but if it’s too tight – it may not come off again.
9. Replace the oil drain plug and tighten it. Your manufacturer will have an exact specification on how much torque should be applied to this bolt, but most people don’t own a torque wrench. Again, the common rule of thumb here is tight + quarter turn. Use common sense – you shouldn’t have to put your body weight into tightening this bolt, but you should not be able to loosen it again without a nice smack of the wrench.

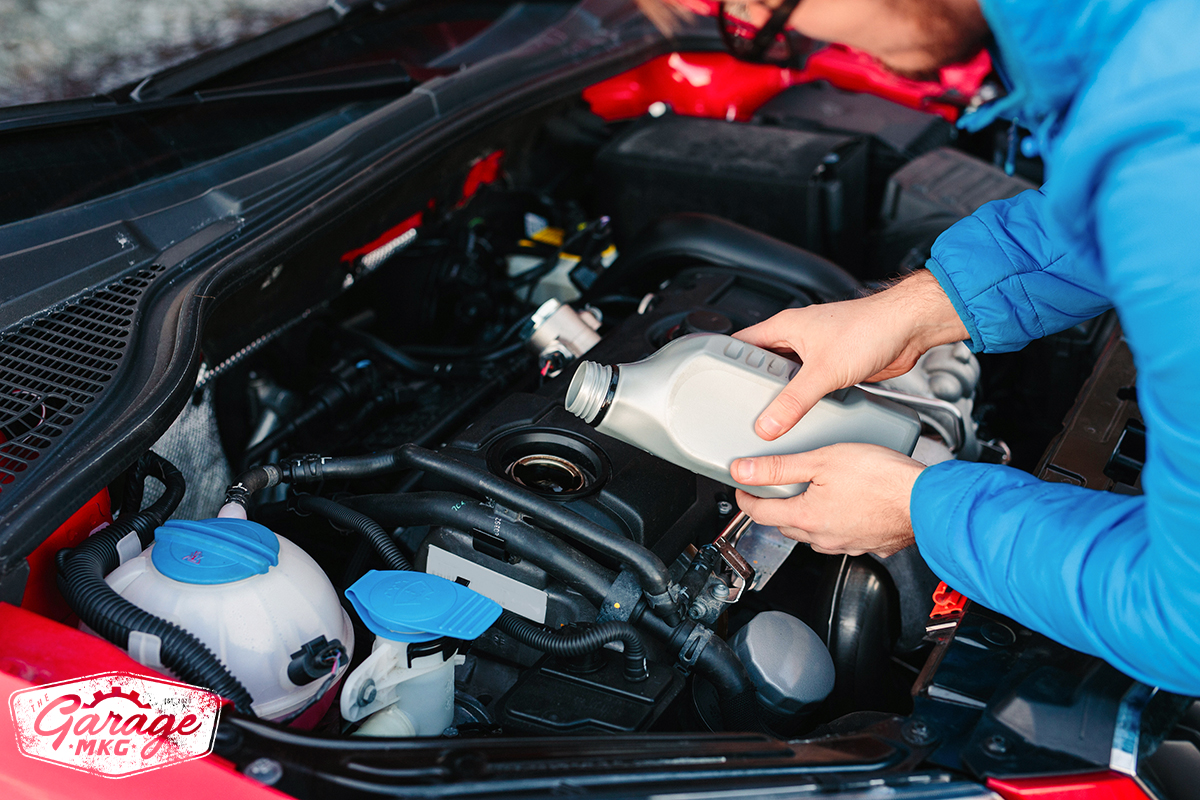
- Insert your funnel into your engine (via the oil filler neck/cap), and add your new oil. How much oil to add, and what weight, depends on your vehicle – your manufacturer will recommend this in your service manual, but you can also find this information pretty easily online.
11. Replace the engine oil filler cap and dipstick.
12. Start your vehicle, check your oil pressure, and clean up! Once your oil is filled, your oil cap and dipstick are in & tight, return to your vehicle and start it. You’re checking for one of two things: either your red oil light will turn off, or if you have an oil pressure gauge, it should show that the engine has oil pressure. Once you’ve confirmed this, hop out of the vehicle and inspect for any leaks. If you don’t see anything leaking, you’ve successfully completed your oil change! If you do find a leak, you may need to check that you’ve tightened your drain plug and filter correctly.
Once you’ve done your oil change, the last step is to dispose of your used oil! The most common method of disposing of this oil safety is to bring it to a local automotive or oil change shop – most of these businesses will gladly accept your used oil, potentially for a small fee of a few bucks.
The Benefits Of Getting Your Oil Change Done For You
Of course, if you’re not quite ready to embark on completing this service yourself, you may want to get your oil change taken care of by an expert. There are a few benefits to getting your oil change taken care of by a shop like us, however.
It’s Usually Not Just An Oil Change
When you get your oil change performed at an automotive repair shop like ours, we’ll take the time to perform other maintenance checks on your vehicle to make sure it’s in top shape, such as: checking & adjusting your tire pressure, making sure other fluids like engine coolant, power steering fluid, and transmission fluid are still protecting your vehicle, and making sure your air filters are free of debris (check out our post about why you should check & change air filters here).
While some auto service centers like quick lubes and dealerships do offer ‘oil & filter only’ oil changes (usually indicated by an almost unbelievable, hyper-affordable price), it is extremely common for auto repair shops to include a ‘check-up’ on your fluids, tire pressures, and air filters as a part of their oil change service.
If you’re ever wondering what comes with your oil change, don’t hesitate to ask what’s included by calling the shop and consulting them before your visit.
Some Vehicles Have More Complicated Oil Changes
In addition to having your vehicle checked over by an expert, there’s another reason that you may want to have an automotive expert do your oil change – sometimes, they can get pretty complicated!
Not all oil filters are made – or placed – the same. Some oil changes, for example, may require you to remove a large skidplate with more than 10 bolts/screws, in order to access your oil drain plug and/or filter. Hummer H2s are notorious for this – with thick metal skidplates protecting the bottom of the vehicle, that must be removed for service.
On other vehicles, like Mini Coopers, the oil filter is located on the topside of the engine, tucked onto the side of the engine with a ‘cup-style’ oil filter housing barely revealing itself, and one that would easily be ‘miss-able’ by an untrained eye.
Some Toyotas also have a ‘cup-style’ filter located on the bottom of the engine, one that requires a specialty tool to remove and retighten safely.
Save Yourself Time & Energy
Lastly, if you’re like many people, you probably have something to do today. Something to do tomorrow. You may not have time to complete your own oil change, you may not have the space to do it!
There are countless reasons why you may want to get your engine oil changed by an auto shop or expert, but a very common benefit is simply ‘convenience’. No trip to the store for oil, no trip to the parts store for a specialty oil filter tool, no jacking the car up, no crawling under it – simply drop your car off, and free up that time to focus on other things in life – family, fun, work, you name it.
In addition, a comparable oil change is usually not that much more expensive than doing it yourself – especially when you factor in the time savings above.
Overall, knowing how to do an oil change is a very important skill for those wishing to do their own vehicle maintenance. However,often, it is more practical for you to take your vehicle to expert like us to get your oil change performed!
If you’re in the Muskegon, MI, or Lakeshore area, click here to learn more about our maintenance services & how to book your next oil change with us!